Wednesday, April 18, 2012

It's A Keeper Thursday: Recipe and Project Linky

This week I'm delighted to be co-hosting It's a Keeper Thursday with Christina from It's a Keeper! Check out Christina's blog, which is a great resource for product and cookbook reviews, as well as many tasty recipes.
It's a Keeper

Thank you to Christina for hosting this event that allows bloggers to share their favorite recipes and creative craft projects. We can't wait to see what you have to offer this week!
Here are a few guidelines:
  • Your link should be a food or craft/project related item. Link up as many as you’d like!
  • Add the It's A Keeper button to your sidebar or blog post – help spread the word!
  • Be sure to check out some of the awesome posts that others have linked up! Let them know that It’s a Keeper and/or Sweet Natured Treats sent you!

Health(ier) Buffalo Chicken Sandwich

Well, hello there! Long time, no blog. Sorry about that. I hate to make excuses, but life's gotten a little busy as of late. I'll try to do better, I promise.

As you've probably noticed, I like to bake. A lot. Unfortunately, I haven't been able to convince David that we can, in fact, subsist on cheesecake and cookies (but wouldn't that be awesome). Since we do have to actually eat real food sometimes, I am forced to cook. Yes, forced. You see, I love to bake, but cooking always seems like a chore. Weird, right? Anyway, I decided that I would start sharing some of the savory things that come out of my kitchen, alongside the barrage of sweets that you're accustomed to. I can't promise anything too earth shattering, since I am a far more creative baker than I am cook, but here goes.


If you live in the south, chances are you have at least heard of and probably eaten at Zaxby's. For those not in the know, Zaxby's is a regional fast food joint that specializes in chicken fingers. While I fancy myself a foodie, I must admit that the Kickin' Chicken Sandwich from Zaxby's is one of my weaknesses. It consists of three chicken fingers (deep fried, of course), hot wing sauce, ranch dressing (full-fat, naturally), all piled on top of thick-cut slices of buttery Texas toast. Sounds pretty tasty, right? Unfortunately, this little gastronomic delight is not exactly figure friendly, weighing in at around 700 calories and 40 grams of fat.

So, what's a girl to do? Recipe makeover, of course. My version of the sandwich includes chicken tenders that are breaded in panko breadcrumbs and then baked, not fried. Instead of ranch dressing, I made a reduced-fat blue cheese dressing with a Greek yogurt base. I then grilled up a couple of lightly-buttered slices of thin sliced Italian bread. To top it off, I used my favorite wing sauce, Frank's Buffalo Wing Sauce. The verdict? David and I both thought these were better than Zaxby's for a couple of reasons: they were far less greasy, and we both preferred the blue cheese dressing that I made to the ranch that Zaxby's serves. Plus, mine weighs in at around 375 calories and 12 grams of fat, which is much more figure friendly than the original.

Health(ier) Buffalo Chicken Sandwich
serves 4


Baked Buffalo Chicken Tenders
adapted from: Food.com

1 pound boneless, skinless chicken tenders, cut into 1/2" strips
2 tablespoons flour
1 teaspoon garlic powder
1 teaspoon paprika
1/2 teaspoon onion powder
1/4 teaspoon salt
1/8 teaspoon ground cayenne pepper
1 egg, lightly beaten
1 1/2 cups panko breadcrumbs
cooking spray
1/2 cup Frank's Buffalo Wing Sauce (or wing sauce of your choice)

1. Pre-heat the oven to 400 degrees. Lightly spray a baking sheet with non-stick cooking spray.
2. Combine flour, spices, and salt together in a shallow dish. Place egg in a separate shallow dish. Place panko in a third shallow dish.
3. One at a time, dredge chicken pieces through the flour, then dip in egg, and finally dredge in panko. Place strips on the prepared baking sheet.
4. Lightly spray the tops of chicken tenders with cooking spray. Bake in the pre-heated oven for approximately 15 minutes, turning once half-way through cooking.
5. Toss cooked chicken with wing sauce to evenly coat.

Reduced-Fat Blue Cheese Dressing
adapted from: Clean and Delicious

1/3 cup non-fat Greek yogurt
1 tablespoon light mayonnaise
2 teaspoons red wine vinegar
1/2 teaspoon Worcestershire
1/8 teaspoon garlic powder
2 tablespoons crumbled blue cheese
salt and pepper to taste

Whisk together first five ingredients until smooth. Fold in blue cheese. Season with salt and pepper.

"Skinny" Texas Toast
8 slices thin sliced Italian bread (I used this one)
2 tablespoons light spreadable butter

1. Heat a large skillet or griddle to medium high. Butter one side of each piece of bread and grill until golden brown.
2. Assemble sandwiches with three to four chicken tenders, approximately two tablespoons of blue cheese dressing, and two slices of Texas toast.

Linked to: Tastetastic Thursday

Wednesday, March 28, 2012

Cupcake Palooza: Tropical Carrot Cupcakes with White Chocolate Cream Cheese Frosting


A couple of weeks ago, my friend Angela from Spinach Tiger asked if I would be interested in participating in Cupcake Palooza. At the time I had never heard of the event, but since it obviously involved cupcakes, I was intrigued. Who doesn't love cupcakes, right? The event invited professional cupcakers, as well as home bakers, to donate ten to twenty dozen cupcakes. Guests could purchase a $15 ticket, which entitled them to ten cupcakes of their choosing. A little more investigation revealed that the event would benefit Books from Birth of Middle Tennessee, an organization that is focused on increasing literacy and school readiness, which is an important and worthwhile cause.

Angela, Grishma from Zaika Zabardast, and I decided to share a table to lighten our individual baking loads. We each wanted to make different flavored cupcakes, but we wanted to stick to a theme. Since it's springtime and Easter is just around the corner, that seemed like an appropriate jumping off point. Angela made Coconut Cupcakes with Coconut Cream Cheese Frosting. Grishma brought Pina Colada Cupcakes filled with pineapple curd. I shared Tropical Carrot Cupcakes with White Chocolate Cream Cheese Frosting.


As I mentioned in my "Blue Ribbon" Peppermint Patty Brownie post, I won several ribbons at the Tennessee State Fair last year. One of them was in the "Vegetable Cake" category for my Tropical Carrot Cake with White Cream Cheese Frosting. Prior to Cupcake Palooza I had only ever made this recipe as a layer-cake, never cupcakes. I was a little concerned that the recipe may not translate as well in cupcake form, but fortunately they turned out great! As an additional challenge, I made a small batch of eggless cupcakes to share with Grishma and her husband, as they are lacto-vegetarians. For my first foray into eggless cake baking, I would say they were a smashing success. In fact, I could barely tell a difference between the two.

Tropical Carrot Cupcakes


Original Version
adapted from: King Arthur Flour and inspired by: Annie's Eats
Yield - approximately 70 mini cupcakes, 22-24 standard cupcakes, or one 2 layer 9-inch cake

1 1/2 cups vegetable oil
14 ounces (2 cups) sugar
4 large eggs
1 tablespoon vanilla extract
8 1/2 ounces (2 cups) all-purpose flour
2 teaspoons baking soda
1 tablespoon cinnamon
1/2 teaspoon ginger
1/4 teaspoon clove
1/4 teaspoon nutmeg
1 teaspoon salt
2 cups finely grated carrots
1 cup flaked coconut
1 cup pineapple tidbits
3 tablespoons crystallized ginger, diced
1 cup chopped macadamia nuts

1. Pre-heat oven to 350 degrees. Line muffin tin with cupcake liners.
2. Beat oil, sugar, eggs, and vanilla extract together in a large bowl. In a separate bowl, whisk together flour, baking soda, spices and salt.
3. With mixer on low, gradually add dry ingredients to wet ingredients until just incorporated. Stir in carrots, coconut, pineapple, and ginger.
4. Fill liner 2/3 full with batter. Bake for 15-20 minutes for mini cupcakes (longer for regular cupcakes), or until they test done using a toothpick.

Eggless Version
adapted from Renu's Kitchen
Yield - approximately 36 mini cupcakes

1/2 cup vegetable oil
1/2 cup Greek yogurt
1 cup brown sugar
1 teaspoon vanilla extract
4 1/4 ounces (1 cup) all-purpose flour
1/2 teaspoon baking powder
1/2 teaspoon baking soda
1 1/2 teaspoons cinnamon
1/4 teaspoon ginger
1/8 teaspoon clove
1/8 teaspoon nutmeg
1/4 teaspoon salt
1 cup finely grated carrot
1/2 cup flaked coconut
1/2 cup pineapple tidbits
1 1/2 tablespoons crystallized ginger, diced
1/2 cup chopped macadamia nuts

1. Pre-heat oven to 350 degrees. Line muffin tin with cupcake liners.
2. Beat oil, yogurt, sugar, and vanilla extract together in a large bowl. In a separate bowl, whisk together flour, baking soda, spices and salt.
3. With mixer on low, gradually add dry ingredients to wet ingredients until just incorporated. Stir in carrots, coconut, pineapple, and ginger.
4. Fill liner 2/3 full with batter. Bake for 15-20 minutes for mini cupcakes (longer for regular cupcakes), or until they test done using a toothpick.

White Chocolate Cream Cheese Frosting

4 ounces white chocolate
2 tablespoons heavy cream
8 ounces cream cheese, softened
8 tablespoons unsalted butter, softened
4 cups powdered sugar

1. Melt white chocolate together with heavy cream in either a double boiler or in the microwave in 15 second increments. Set aside to cool.
2. Beat together cream cheese and butter until thoroughly combined. Beat in melted white chocolate. Add powdered sugar in batches, beating with each addition. If a stiffer frosting is desired, add additional powdered sugar.

Linked to: Ingredient Spotlight, Mrs. Fox's Sweet Party, Midweek Fiesta

Tuesday, March 13, 2012

Samoas Cheesecake Bites


People tend to have very strong opinions about which Girl Scout cookie variety is the best. I've heard that Thin Mints are the best selling variety year after year. I can certainly see why. It's chocolate. It's peppermint. It's delicious. It's very refreshing. Kudos to those that get the Seinfeld Junior Mint reference; those that don't, well thanks for making me feel old. Anyway, Thin Mints are definitely one of my favorites, but they don't hold the top spot on my list. No, that spot is reserved for Samoas (or Caramel Delites, depending on your geographic location).

Samoas represent everything that is good in the world: chocolate, caramel, and toasted coconut all nestled together on a shortbread cookie. I'm pretty sure I could easily polish off an entire box (or maybe three) in one sitting. This year I exercised a little self-restraint and didn't immediately inhale the two boxes I ordered from a friend's daughter. Instead, I used about half of a box to make these cheesecake bites. Because, apparently, I like to turn things into cheesecake (exhibits A, B, C, D, and E). I'm actually kind of obsessed with creating new cheesecake flavors, or at least tweaking old ones. I hope you don't mind.


When I was initially struck with the idea of making Samoas cheesecake bites, I knew I didn't want to just make a plain cheesecake with some Samoas thrown in and call it a day. No way. I wanted to make mini cheesecakes that actually looked like Samoas. I started by making a shortbread cookie crumb crust, then I topped that with a Samoas laced cheesecake filling. Once the filling was baked and cooled, I spread a mixture of caramel and toasted coconut on top, then I dipped the bases in melted dark chocolate, and finally drizzled melted chocolate over the top. The results absolutely exceeded my wildest expectations. These were amazing. I would venture to say these are my favorite cheesecake creation ever (so far, at least). Coming from me, that is saying a lot. Seriously, if you still have a box of Samoas at your house, make these. You can thank me later.

Samoas Cheesecake Bites
yield: 9 mini cheesecakes


Crust
4 ounces shortbread cookies, finely crushed (I used these; feel free to use Trefoils or other purchased shortbreads)
1 tablespoon sugar
2 tablespoons unsalted butter, melted

1. Pre-heat oven to 350 degrees. Spray the wells of a mini-cheesecake pan with non-stick spray.
2. Toss together cookie crumbs and sugar. Stir in melted butter. Press approximately one tablespoon of crumbs into nine of the wells in the cheesecake pan.
3. Bake crust for approximately 10 minutes, or just until it begins to brown.
4. Remove from oven and allow to cool completely.

Cheesecake Filling
8 ounces cream cheese, softened
1/3 cup granulated sugar
1 egg
1 egg yolk
1 tsp vanilla extract
6 Samoas cookies, roughly chopped

1. Lower oven temperature to 300 degrees. Beat cream cheese and sugar together on medium until smooth, scraping the sides of the bowl and beater blades periodically.
2. Lower mixer speed to low and mix egg, egg yolk, and vanilla. Continue to mix until smooth. (Helpful hint: if your cheesecake batter is lumpy, your ingredients were probably too cold. To remedy this, I use my immersion blender to smooth out the batter).
3. Stir in the chopped cookies. Pour batter over crust, filling to within a 1/2 inch of the top of each well. Bake at 300 degrees for 15-20 minutes, or until just set. Turn oven off and slightly crack door. Allow cheesecakes to cool in the oven for 15 minutes. Remove from oven and allow to cool to room temperature, then chill in the refrigerator for at least two hours.

Topping (and Bottom) - adapted from Baking Bites
1 cup shredded coconut
4 ounces chewy caramels
1 tablespoon milk or cream
Pinch of salt
3 ounces bittersweet or semi-sweet chocolate chips

1. Spread coconut over a parchment-lined baking sheet. Bake at 300 degrees, stirring every 5 minutes, until toasted. Keep a very close watch when the coconut begins to brown, as it can go from nicely toasted to burned very quickly.
2. Melt together caramels, milk, and salt either over a double boiler or in the microwave on high for 3-4 minutes. Stir periodically while heating. (I used some leftover homemade salted caramel sauce that I had in the fridge in place of the caramels and milk.) Once the mixture is smooth, stir in toasted coconut.
3. Spread about 2 teaspoons of the coconut-caramel topping over each cheesecake, and allow to set for a few minutes.
4. In the meantime, melt chocolate in 30 second intervals in the microwave on medium heat, stirring after each interval. Carefully dip the bottom of each cheesecake into the chocolate and transfer to a parchment-lined baking sheet.
5. Once all cheesecake bottoms have been dipped, transfer remaining chocolate to a zip-lock bag with a very small corner snipped off. Drizzle chocolate over coconut-caramel topping. Place cookies in the refrigerator until chocolate covered bottoms have set. Enjoy.

Linked to: Make it Cute, Creative Me, Tempt My Tummy Tuesday, Tea Party Tuesday, Trick or Treat Tuesday, Midweek Fiesta, Mrs. Fox's Sweet Party, What I Whipped Up Wednesday, It's A Keeper Thursday, Ingredient Spotlight

Thursday, March 8, 2012

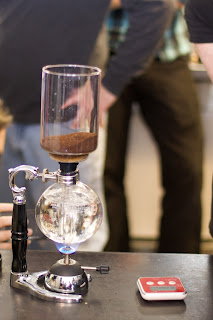
Adventures in Coffee Cupping at Roast, Inc.


A couple of weeks ago, David and I had the pleasure of joining a group of Nashville food bloggers for a coffee cupping event at Roast, Inc., a locally owned coffee roaster that hand selects their coffee from up to sixteen different countries. The owners of Roast, Inc., Brad and Lesa Wood, are slightly obsessed with their coffee. They can tell you where it was grown, who grew it, how and where it was processed, and precisely when it was brought into the US.


In addition to offering extraordinary coffee for purchase by the pound, Roast, Inc.'s coffeehouse, located at 4825 Trousdale Drive, prides itself as being Nashville's only single-cup brewer. Prior to this event I was really only aware of two single cup brewing methods: French press and Keurig. Turns out, there are many others, including:

                     
                               Chemex                                                         Clever Coffee Dripper

              
  Aeropress                                                      Siphon pot

Each method yields a cup of coffee with subtle yet distinct characteristics, from the clean and crisp product of the Yama Siphon Pot to the full-bodied, full-flavored product of the Clever Coffee Dripper. My favorite methods were the siphon pot, mainly because I'm kind of a science nerd, and it's super cool, and the Clever because of its simplicity and ease of use.


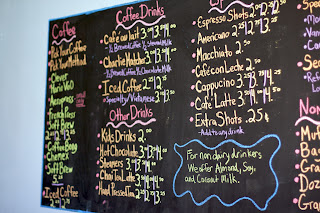
Roast, Inc. also offers all of the typical espresso based drinks made on a hand-rebuilt Rancilio Millennium Two Group Machine.


I'm sure it was some combination of the exceptional quality of the coffee, Lesa's expertise in roasting and brewing, and the use of milk from Hatcher's Family Dairy, but the cappuccino I had at Roast, Inc. was hands down the best I have ever had.


I almost always add some sort of sweetener when I have a cappuccino or latte, but this was perfect all on its own: wonderfully bold with no hints of bitter or burnt flavors.


Another important note: Roast, Inc. uses only natural sweeteners and flavorings in their specialty coffee drinks, including maple syrup and agave nectar. They even make a Nutella latte with nothing but espresso, steamed milk, and Nutella. It was pretty amazing.


Of course this wouldn't have been a proper food blogger meetup without food. We had quite a spread, including a couple of types of quiche, scones, muffins, doughnuts, and my contribution, sausage and biscuits, with sausage from Peaceful Pastures and biscuits made with buttermilk from Hatcher's Family Dairy (and lard from Peaceful Pastures). I'll be sharing my recipe for biscuits in an upcoming post.


I also had the opportunity to get to know a couple of my fellow Nashville food bloggers a little better, particularly Angela from Spinach Tiger (pictured below) and Lisa from Wine with Lisa. During the event we discovered that we all live in the same area, and that Angela and I actually live in the same neighborhood. It was great to meet you ladies, and I look forward to seeing you again soon!


For anyone in Nashville looking for exceptional coffee by the pound, I highly recommend stopping by Roast, Inc. In addition to coffee by the pound and fresh brewed coffee and espresso, they also carry a full line of single-cup brewing gadgets for your home collection, including Chemex, Clever, Aeropress, and siphon pots. If you're a novice coffee brewer like me, be sure to ask for advice on which methods work best for which coffees. They will be more than happy to help you recreate the perfect cup of coffee at home. Thanks again to Brad, Lesa, and Tim for coming in on their day off to share the passion for great coffee with our group!

Wednesday, February 29, 2012

Triple the Irish, Triple the Fun: St. Patty's Day Cheesecake Bites


If you've been reading food blogs for more than a year or so, you've probably seen some iteration of a cupcake incorporating Irish stout, Irish cream, and Irish whiskey (commonly known as the Irish Car Bomb Cupcake, after the popular cocktail). They were all the rage a few years ago when introduced by Smitten Kitchen. I've made them a couple of times, and they really are quite tasty. I mean, it's hard to go wrong with chocolate cake and Irish cream frosting, right?

This year I thought I would try out a new adults-only treat for St. Patty's Day, using the same flavor components of Smitten Kitchen's cupcakes. Since cheesecake is the medium I feel most comfortable working with, that seemed like a good place to start. After a bit of deliberation, I settled on a chocolate stout brownie topped with Irish cream cheesecake and finished off with a dark chocolate Irish whiskey glaze.

These turned out great. You can definitely detect the alcohol in the cheesecake and whiskey glaze, so they aren't a great choice for children or those that don't like the taste of alcohol. For everyone else, these are pretty amazing. They're perfect for  St. Patty's Day. Or any day, really.

Triple Irish Cheesecake Bites (aka Irish Car Bomb Cheesecake Bites)
Yield: 24 mini cheesecakes or 1 6-inch cheesecake


Irish Stout Brownies - adapted from: We're Not Martha
1/2 Cup Irish Stout
2.5 ounces bittersweet chocolate
6 tablespoons butter
1/2 cup brown sugar
1 egg
1/3 cup flour
1/4 cup cocoa powder

1. Preheat oven to 350 degrees. Spray a mini cheesecake pan with non-stick spray. Alternatively, you can line a mini muffin tin with papers.
2. Melt chocolate and butter together in either a double boiler or in 30 second intervals in the microwave on medium heat, stirring after each interval. Continue to stir until completely melted.
3.  Allow chocolate to cool slightly, then whisk in brown sugar until very smooth. Add egg and beat until very smooth. Once eggs are incorporated, stir in Irish Stout.
4. Sift together flour and cocoa powder, then fold dry ingredient into chocolate mixture until incorporated without over mixing.
5. Fill each well 1/3 full with brownie batter. Bake in the pre-heated oven until just set, approximately 12-15 minutes.
6. Remove pan from oven and allow to cool to room temperature.

Irish Cream Cheesecake
1 lb (2-8 ounce packages) cream cheese
1/2 cup sugar
1/4 Irish cream (Bailey's is most popular; I really like Coole Swan brand)
3 eggs

1. Pre-heat oven to 300 degrees. Cut cream cheese into 1-inch chunks and beat at low speed in the bowl of a stand mixer until very smooth, approximately 1-2 minutes. Scrape down sides of bowl and beater blade.

2. With your mixer still on low, add sugar to cream cheese.
 Beat at low speed for 1 minute. Scrape down beater blade and bowl. Add Irish cream and beat until well incorporated.
4. With mixer on low, add eggs. After eggs have been added, thoroughly scrape down sides of bowl and beater blade, and mix on low for 1 minute. 
5. Pour batter over crust, filling to within a 1/2 inch of the top of each well. Bake at 300 degrees for 15-20 minutes, or until set. Remove from oven and allow to cool to room temperature, then chill in the refrigerator for at least two hours.

Irish Whiskey Chocolate Glaze
3 ounces bittersweet chocolate
1/4 cup heavy whipping cream
2 teaspoons Irish whiskey

Melt chocolate and heavy cream together in either a double boiler or in 30 second intervals in the microwave on medium heat, stirring after each interval. Once chocolate is melted, whisk in Irish whiskey. Allow glaze to cool and thicken slightly before drizzling over cheesecakes.

Linked to: Trick or Treat Tuesday, Tasty Tuesday, Tea Party Tuesday, Midweek Fiesta, Mrs. Fox's Sweet Party, Made Famous By, Junk in their Trunk, Sweet Treats Thursday, Tastetastic Thursday, Sweet Temptations, It's a Keeper Thursday, Foodie Friday, Fusion Friday, Flaunt it Friday, Sweet Tooth Friday, Hodgepodge Friday, What I Whipped Up, Tastetastic Thursday, Sweet Temptations

Thursday, February 23, 2012

Whole Wheat Blueberry Lemon Yogurt Pancakes


I was never overly crazy about pancakes when I was growing up. I would eat them on occasion, but they certainly weren't at the top of my list of favorite breakfast foods. I attribute that mainly to growing up in a house that used "pancake" syrup. I was not a fan of "pancake" syrup at all, so I usually ate pancakes and waffles topped with some sort of jam or jelly.

My change in opinion came on the day that I discovered real maple syrup. I suddenly understood what all the fuss over pancakes was about. I was still a boxed mix kind of girl until one day a few years ago I was craving pancakes, and much to my dismay I discovered I was all out of pancake mix. Fortunately I was armed with a well stocked pantry and the power of the internet. One quick Google search later, and we were in business.


That first recipe that I tried was for basic buttermilk pancakes. They were very tasty, but quite lacking in the nutrition department. While you may not guess it from looking at the desserts that I typically post, I actually try to make healthy choices 90% of the time. At first, I tried making pancakes with all regular whole wheat flour. I liked the results just fine, but David gave them a big thumbs down.

Enter white whole wheat flour: all the nutritional benefits of whole wheat flour with a lighter color and texture. It's truly the best of both worlds. Then I subbed the buttermilk for half plain yogurt-half milk, since I'm more likely to have those ingredients on hand. For this batch, I added the juice and zest of a lemon and fresh blueberries. I thought they turned out great, especially with the addition of a healthy dose of maple syrup. David wholeheartedly agreed. So, if you're looking for a pancake recipe that's nutritionally sound and will please even the picky eaters in your house, try these out.

Whole Wheat Blueberry Lemon Yogurt Pancakes
adapted from allrecipes.com
Yield: two generous servings


1 cup white whole wheat flour
1 tablespoon sugar
1 teaspoon baking powder
1/2 teaspoon baking soda
1/4 teaspoon salt
1/8 teaspoon cinnamon
1/2 cup plain yogurt (I usually use greek yogurt; use less milk if using regular yogurt)
1/2 cup milk
1 egg
2 teaspoons vanilla extract
1 tablespoon melted butter
zest and juice of one lemon
1 pint fresh blueberries

1. Whisk all dry ingredients together in a medium sized bowl. I like to use a glass measuring cup with a spout for ease of pouring.
2. Mix yogurt and milk together in a medium bowl until fairly smooth. Add egg, vanilla extract, melted butter, lemon juice, and lemon zest. Beat until well combined.
3. Pour wet ingredients over dry ingredients and stir just until combined. Do not over mix or pancakes may be tough. Batter will likely look a little lumpy. Set mixture aside to rest for 15 minutes.
4. Spray a griddle or frying pan with non-stick spray or rub with oil and heat on medium high. When a drop of water sizzles on the surface of the pan, it is hot enough.
5. Pour rounds of batter of desired size onto the heated griddle. Immediately drop blueberries evenly over the surface of the pancakes. Allow pancakes to cook until golden brown on both sides, flipping only once. Spray or re-oil griddle after cooking each batch. Top as desired. Any leftovers will keep in the refrigerator for a couple of days or can be frozen for up to a month.

Linked to: Ingredient Spotlight, Full Plate Thursday, Strut Your Stuff Thursday, It's a Keeper Thursday, Chic and Crafty, Sweet Treats Thursday, Feature Yourself Friday, Foodie Friday, Sweet Tooth Fridays, Comfy in the Kitchen, Hodgepodge Friday, Shine on Friday, Slightly Indulgent Tuesday, Trick or Treat Tuesday

Friday, February 17, 2012

Mini Twix Cheesecake Bites


Ok, so these don't actually contain any Twix® candy bars, but "milk chocolate glazed mini dulce de leche cheesecakes on a shortbread cookie crust" is a bit of a mouthful. So, for now we'll just call them Twix® cheesecake bites, since they have all of the same flavor components. If someone has a better suggestion, I'm all ears.

I made these for a friend's Superbowl party a couple of weeks ago. When the Evite showed up in my mailbox, I immediately asked what I could bring. I believe the response was something along the lines of "Dessert ;)", with another friend quickly commenting "well, duh." It seems I have a bit of a reputation among my friends as the designated dessert maker.

These little beauties came together very quickly, especially since I already had a half a batch of leftover shortbread cookie dough hanging out in my freezer. The cheesecake base is quite possibly the easiest cheesecake I've ever made: it's just three ingredients. And the milk chocolate ganache really pushes them over the edge. I'm sure dark or semi-sweet would be just as good, but I wanted to stick with the Twix® theme. If you're a fan of Twix® bars, you're sure to love these.

Milk Chocolate Glazed Dulce de Leche Cheesecakes on a Shortbread Cookie Crust (aka Twix® Cheesecake Bites)
Yield - 18 if using a mini-cheesecake pan, approximately 30 if using a mini-muffin tin
Source: crust adapted from allrecipes.com; cheesecake adapted from recipe on Nestle Dulce de Leche label


1/2 recipe of All-Butter Shortbread dough (feel free to use your favorite shortbread recipe)
16 ounces cream cheese, softened
1 13.4 oz can dulce de leche
2 eggs
6 ounces milk chocolate chips
1/3 cup heavy whipping cream

1. Preheat oven to 350 degrees. Spray a mini cheesecake pan with non-stick spray. Alternatively, you can line a mini muffin tin with papers.
2. Press about one rounded teaspoon of shortbread dough into each well of your prepared pan. The dough should completely cover the bottom.
3. Bake for approximately 10-12 minutes, until cookies just start to brown. Remove from the oven and allow to cool completely. Reduce oven temperature to 300 degrees.
4. While the crusts are cooling, beat together cream cheese and dulce de leche on medium-low until very smooth. Thoroughly scrape bowl and beater blade. Add eggs one at a time, again beating on medium-low until smooth.
5. Pour batter over crust, filling to within an inch of the top of each well. Bake at 300 degrees for 15-20 minutes, or until set. Remove from oven and allow to cool to room temperature, then chill in the refrigerator for at least two hours.
6. Combine chocolate and whipping cream in a microwave safe bowl. Heat on medium-low heat in 20 second intervals, stirring after each interval, until chocolate is melted and mixture is smooth. DO NOT ALLOW MIXTURE TO BOIL.
7. Dip the top half of each cheesecake into the melted chocolate. Return to the refrigerator for at least 30 minutes to allow the chocolate to set. 

Linked to: Comfy in the Kitchen, Foodie Friday, Fusion Fridays, Flaunt if Friday, Sweet Tooth Friday, Hodgepodge Friday, Sweets for a Saturday, Market Yourself Monday, Just Something I Whipped Up, Melt In Your Mouth Monday, Make it Cute, Creative Me, Tempt My Tummy Tuesday, Tea Party Tuesday, Trick or Treat Tuesday, Midweek Fiesta, Show and Tell Wednesday, Will Craft For...

Sunday, February 12, 2012

How to: Embossed Fondant Covered Valentine's Cookies


Still trying to decide what to make for your sweetie for Valentine's Day? How about a batch of beautifully decorated cookies. Maybe you're saying, "but I'm no good at decorating cookies." No problemo. These cookies are almost foolproof. They do require a few special tools, but if you can play with Play-Doh, you can make impressive looking cookies. As a bonus, the process is quick, and unlike cookies decorated with royal icing, they don't have to dry. Here's a brief tutorial on the process I used to make the cookies pictured here, using this recipe for chocolate chip cut-out cookies from The Sweet Adventures of Sugarbelle.


You will need:
Your favorite recipe for cut-out cookies, cut out in the shape(s) you desire, baked and cooled completely
Cookie cutters of desired shape(s)
Rolled fondant of desired color(s) - You can make your own if you like; I prefer Satin Ice
1 tablespoon corn syrup thinned with 1 tablespoon water
Impression mat(s) - I used a couple from my favorite local cake supply store (Sweet Wise), but you can find them at most craft supply stores
Luster Dust or Pearl Dust
2 food safe craft brushes (at least one should be soft bristled)


1. Roll fondant out fairly thin (about 1/16 inch) on a surface dusted with powdered sugar or cornstarch. I recommend working with small amounts of fondant at a time, as it dries out quickly on the counter. Alternatively, you can roll out fondant using The Mat, which is awesome to have in your decorating toolkit if you do very much work with fondant.
2. Using cookie cutter of desired shape, cut out fondant.
3. Using one of your craft brushes, apply a very thin layer of corn syrup/water solution on the surface of a cookie of the same shape.
4. Gently lift the fondant cut-out off the counter and lightly press onto the prepared cookie. Take care to not get any corn syrup on the side of the fondant that will face up. This will make your impression mat stick to the fondant, and will cause a mess.
5. Using the soft-bristled craft brush, lightly brush a coat of Luster or Pearl Dust over the fondant. This will not only make the design on your cookies stand out better, but it will also help ensure that the impression mat doesn't stick to the fondant.
6. Place an impression mat over the Luster Dust covered fondant. Gently and evenly press down over the surface of the cookie. Take particular care for cookies that are fragile, such as the "X" pictured. I broke a couple of them during this step. Carefully lift off the impression mat. If desired, apply another thin layer of Luster Dust.
7. Repeat with remaining cookies. That's it. You're finished.

Linked to: Creative Me, Make it Cute Monday, Just Something I Whipped Up, Comfy in the Kitchen, Tip Me Tuesday, Tasty Tuesday, Trick or Treat Tuesday, Too Cute Tuesday

Tuesday, February 7, 2012

Chewy Coconut Chocolate Almond Butter Cookies (gluten-free, dairy-free)

These cookies are pretty amazing, on a few levels. First and foremost, they taste like eating an Almond Joy candy bar in chewy cookie form. Sounds pretty good, right? You know what's even better? They're not that bad for you. In fact, for cookies, these are basically health food: they contain no flour, no butter, and no processed sugar. On top of that, they are so easy to make. They come together in under five minutes flat. And you won't even have to turn on your mixer or dirty up a sink full of dishes.

I promise you would never guess that these are "healthy" cookies. They are intensely chocolatey, pleasantly chewy, and just sweet enough. They even passed the "David test", and that is saying a lot. Have I convinced you to make them yet? Well, what are you waiting for?

Chewy Coconut Double Chocolate Almond Butter Cookies
adapted from Clean Eating Magazine


1 egg
1 tsp vanilla extract
1/2 cup sucanat (can substitute light brown sugar)
1/4 tsp kosher salt
1/2 tsp baking soda
1 cup chocolate almond butter (I used Justin's, but I'm sure others would work, or you could probably make your own)
1/2 cup shredded coconut
3 ounces dark chocolate, roughly chopped

1. Pre-heat oven to 350 degrees. Line a baking sheet with parchment paper.
2. Whisk together egg and vanilla until foamy. Add sugar, salt and baking soda, whisking until light and fluffy. Whisk in almond butter (this may take a little time, since the batter gets pretty thick). Stir in coconut and chocolate.
3. Drop batter by teaspoonfuls onto the prepared  baking sheet. Bake for 10-12 minutes until edges are set. Allow to cool on baking sheet for at least 5 minutes, then cool completely on a cooling rack. Yields approximately 15-18 cookies.

Linked to: Tempt My Tummy, Tea Party Tuesday, Trick or Treat Tuesdays, Tasty Tuesdays, Gluten Free Wednesday, Mrs Fox's Sweet Party, Midweek Fiesta, Sweet Treats Thursday, Famous Linkz, Tastetastic Thursday, Sweet Temptations, One Stop Shoppe, Comfy in the Kitchen, Slightly Indulgent Tuesday

Thursday, February 2, 2012

Mini Nutella-Frangelico Cheesecake Bites


As I'm sure most of you know, Sunday is a big day. A day that many of us have been anxiously awaiting since last year. No, I'm not talking about the Super Bowl. This is much bigger and more important than some football game. I'm talking about World Nutella Day. The one day of the year dedicated to celebrating that wonderful chocolate-hazelnut concoction that so many around the globe love.


So, how will you be celebrating this year? Perhaps you'll start the day off with Nutella waffles? How about a Nutella latte as an afternoon pick-me-up? Or maybe you're the type to just eat it straight out of the jar, on a spoon (or your fingers). Not that I would ever do such a thing. Of course not. I am a sophisticated Southern lady, after all. (Alright, those that know me can stop laughing now).

We at the Sweet Natured Treats household will celebrate World Nutella Day as we celebrate most special occasions: with cheesecake. Mini Nutella-Frangelico Cheesecake Bites, actually. These tiny bites of cheesecake heaven combine a chocolate wafer crust made with a touch of Frangelico (hazelnut liquer), swirled Frangelico and Nutella cheesecake, and a dollop of Frangelico infused ganache. They're everything a Nutella lover could want. If you're feeling generous, you could even share them with friends at a Super Bowl party. Or keep them all for yourself. Totally up to you.

Mini Nutella-Frangelico Cheesecake Bites
Yield: 8 mini cheesecakes (12 if using a mini-muffin tin)
source: an Angie original


Crust
3 ounces chocolate wafer cookies (I used theseOreos with the centers removed will work fine)
1 tablespoon butter, melted
1 tablespoon Frangelico (or other hazelnut liquer)

1. Preheat oven to 350 degrees. Spray a mini cheesecake pan with non-stick spray. Alternatively, you can line a mini muffin tin with papers.
2. Finely crush the cookies. Combine with the melted butter and Frangelico. Stir to thoroughly combine. If using a mini cheesecake pan, firmly press the mixture into eight of the wells; fill twelve wells if using a mini muffin tin.
3. Bake for 10-12 minutes, keeping a close watch to ensure crust does not burn. Remove from oven and allow to thoroughly cool.

Cheesecake Filling
8 ounces cream cheese, softened
1/4 cup sugar
1 egg
1 tablespoon Frangelico (or other hazelnut liquer)
2 tablespoons Nutella

1. Preheat oven to 300 degrees. Beat cream cheese with an electric mixer on medium-low for one minute. Add sugar and beat on low until smooth. Scrape sides of bowl and beater blade. Add egg and continue beating until combined. Scrape sides of bowl again, add Frangelico, and beat until incorporated.
2. Transfer approximately half of filling to another small bowl. Stir the Nutella into half of the filling. Drop spoonfuls of each batter over the prepared crust, and lightly swirl.
3. Bake for 15-20 minutes, or until set. Remove from oven and allow to cool to room temperature, then chill in the refrigerator for at least two hours.

Frangelico Ganache
3 ounces bittersweet chocolate
1/4 cup heavy whipping cream
1 tablespoon butter, unsalted, room temperature
1 tablespoon Frangelico

1. Combine chocolate and whipping cream in a microwave safe bowl. Heat on medium-low heat in 30 second intervals, stirring after each interval, until chocolate is melted and mixture is smooth. DO NOT ALLOW MIXTURE TO BOIL. Allow chocolate to cool slightly, and them whisk in butter and Frangelico until incorporated.
2. Allow mixture to thicken to piping consistency. This may take several minutes. You may wish to place the ganache in the refrigerator or freezer to speed cooling, but be sure to whisk the mixture and check consistency at least every 10 minutes.
3. Transfer thickened ganache into a piping bag fitted with either a large open or closed star tip, depending on the pattern that you desire. Pipe ganache on top of cakes in desired pattern.

Linked to: Foodie Friday, Comfy in the Kitchen, Fusion Fridays, Flaunt it Friday, Sweet Tooth Friday, It's a Hodgepodge Friday, Shine On Fridays, Sweets for a Saturday, Mouth Watering Monday, Market Yourself Monday, Just Something I Whipped Up, Melt in Your Mouth Monday, Making the World Cuter, Creative Me Monday, Show Me How, Tempt My Tummy, Tea Party Tuesday, Trick or Treat Tuesday, Tasty Tuesdays, Mrs Fox's Sweet Party, Midweek Fiesta, Sweet Treats Thursday, Famous Linkz, Tastetastic Thursday, Sweet Temptations, One Stop Shoppe, Kitchen Fun and Crafty Friday, Ingredient Spotlight

Tuesday, January 31, 2012

Blueberry Orange Muffins (Gluten-Free)


As I mentioned previously, I am a relative newbie when it comes to gluten-free baking. Neither David nor I eat a gluten-free diet, so most of my baking ventures involve traditional ingredients. We do have a few friends, however, who follow a gluten-free lifestyle. I made these muffins when one such friend came over for brunch.

I'll admit that I wasn't quite sure what to expect, as I'm not sure that I had ever even eaten a gluten-free muffin before. I must say, I was pleasantly surprised. Everyone agreed that these were quite tasty. They're moist and tender with tons of juicy fresh blueberries and subtle hints of orange. These may have actually been some of the best muffins I've ever made. Feel free to change up the flavors. I'm sure chocolate chips would be great in place of blueberries, or maybe sub the orange zest for lemon zest.

Blueberry Orange Muffins (Gluten-Free)
adapted from King Arthur Flour

5 1/4 ounces sugar
4 ounces (1/2 cup, 1 stick) unsalted butter, softened
1/2 teaspoon salt
2 teaspoons baking powder
1/4 teaspoon nutmeg
1/2 teaspoon cinnamon
zest of one orange
2 teaspoons vanilla extract
2 large eggs
10 1/2 ounces gluten-free multi-purpose flour (I highly recommend this one)
 1 teaspoon xanthan gum
4 ounces milk
1 1/2 cups fresh blueberries
2 teaspoons coarse sanding sugar

1. Preheat oven to 375 degrees. Line a 12-cup muffin tin with muffin liners. To aid release, spray liners with non-stick spray.
2. Combine sugar, butter, salt, baking powder, nutmeg, cinnamon, orange zest, and vanilla extract in a mixing bowl. Beat on medium-high until fluffy.
3. Add eggs one at a time, scraping the bowl and beater blades after each addition.
4. Whisk flour with xanthan gum. Alternatively add flour mixture and milk to the mixing bowl, beating on medium-low speed until thoroughly combined. Stir in blueberries.
5. Divide batter evenly between twelve muffin cups. Cups should be filled to the top. You may want to smooth the tops a bit, as they won't smooth out while baking. Sprinkle muffins with sanding sugar.
6. Allow muffins to rest for 10 minutes. Bake for 20-25 minutes, or until tops of muffins are lightly browned. Allow muffins to cool for 5 minutes in the pan. Serve warm if desired, or allow to cool to room temperature on a cooling rack.

Linked to: Tasty Tuesdays, Tempt My Tummy Tuesday, Totally Tasty Tuesday, Gluten-Free Wednesdays, Show and Tell Wednesday, What I Whipped Up Wednesday, Trick or Treat Tuesday, Mrs. Fox's Sweet Party

Wednesday, January 25, 2012

Red Velvet White Chocolate Cheesecake (for two)


Valentine's Day is just around the corner, and if you're anything like me, the last thing you want to do is fight the crowd at a restaurant on what is one of its busiest nights of the year. Don't get me wrong, I enjoy having someone else do the cooking on a regular basis. Just not on Valentine's Day. Instead, David and I usually stay in and celebrate with dinner that's a little fancier than usual and a nice bottle of wine. And of course the night wouldn't be complete without a killer dessert.

Speaking of killer desserts, this one is pretty high on the list. By now, most everyone has seen some iteration of the red velvet cheesecake, whether it's similar to this one over at Erin's Food Files, or this one at Culinary Concoctions by Peabody. While both of these look and sound fantastic, the last thing I need in my house is a full-size cheesecake. I have no self control when there is cheesecake around. For that reason, I usually only make them when feeding a crowd. Fortunately, these mini cheesecakes offer the perfect solution.

Of course me being me, I couldn't just make a mini version of one of the many recipes for red velvet cheesecakes that are available. Nope. I had to add chocolate. Well, white chocolate. The cheesecake and the cream cheese frosting both have a healthy dose of melted white chocolate mixed in. I think this extra step really takes this already spectacular dessert over the top. Seriously, white chocolate cream cheese frosting may just be my new favorite thing. If you're looking for a special dessert for Valentine's Day, or any day for that matter, here's a portion controlled one that's sure to please.


Mini Red Velvet White Chocolate Cheesecakes (for two)

White Chocolate Cheesecake Layer
1 ounce white chocolate
1 ounce heavy cream
4 ounces cream cheese, softened
2 tablespoons sugar
1 egg
1/2 teaspoon lemon juice
1/2 teaspoon vanilla extract

1. Pre-heat oven to 300 degrees. Butter two wells of a small cheesecake pan. (I recommend this one).
2. Melt white chocolate with heavy cream either in a double boiler or in the microwave in 15 second intervals, stirring until smooth. Set aside to cool.
3. Beat together cream cheese and sugar on medium speed until smooth. Add egg, lemon juice, and vanilla, mixing on medium-low speed until well blended. Finally, add melted white chocolate and mix on low until incorporated.
4. Divide batter between the two cheesecake wells. Bake until set, approximately 15 minutes.
5. Allow cheesecake to cool to room temperature, then refrigerate at least two hours.

Red Velvet Cake adapted from: Dessert For Two and The Pastry Queen via Confections of a Food Bride
1/4 cup unsalted butter, softened
1/4 cup sugar
1 egg white
1 teaspoon red food coloring
2 teaspoons unsweetened cocoa powder
1/3 cup plus 2 tablespoons cake flour
1/8 teaspoon salt
1/8 teaspoon baking soda
1/2 teaspoon vanilla extract
2 tablespoons buttermilk
2 tablespoons sour cream
1/8 teaspoon white vinegar

1. Pre-heat oven to 350 degrees. Butter two wells of a mini cheesecake pan.
2. Cream together butter and sugar on medium-high until light and fluffy. Add egg white and continue beating until thoroughly combined.
3. With mixer off, add food coloring and cocoa powder. Mix on low until incorporated, then beat on medium-high for two minutes.
4. Sift together flour, salt, and baking soda. Mix together vanilla extract and buttermilk. Alternate adding half of dry ingredients with half of buttermilk/vanilla mixture to the butter mixture, beating on medium until combined after each addition. Mix in sour cream and vinegar on low speed until combined.
5. Divide batter between the two prepared wells. Bake until cakes test done with a toothpick, 20-25 minutes. Allow cakes to cool for about five minutes in the pan, then transfer to a cooling rack to complete cooling.

White Chocolate Cream Cheese Frosting
1 ounce white chocolate
1 tablespoon heavy cream
2 ounces cream cheese, softened
2 tablespoons unsalted butter, softened
2/3 cup powdered sugar

1. Melt white chocolate together with heavy cream in either a double boiler or in the microwave in 15 second increments. Set aside to cool.
2. Beat together cream cheese and butter until thoroughly combined. Beat in melted white chocolate. Add powdered sugar in batches, beating with each addition. If a stiffer frosting is desired, add additional powdered sugar.

Assembly
white chocolate shavings
powdered red food coloring (optional)
cocoa powder (optional)

1. If necessary, level mini-red velvet cakes, then cut each cake into two halves using a serrated knife.
2. Place one chilled cheesecake layer between two layers of cake.
3. Cover each cake with a thin crumb coat of frosting to lock in any loose crumbs, then chill for at least 30 minutes. Apply a final coat of frosting and garnish with white chocolate shavings. If desired, sprinkle with powdered red food coloring or cocoa powder.
4. Refrigerate until ready to serve.

Linked to: What's Cooking Wednesday, What I Whipped Up Wednesday, Mrs. Fox's Sweet Party,  These Chicks Cooked, Strut Your Stuff, Sweet Treats Thursday, Famous Linkz Party, It's a Keeper Thursday, Sweet Temptations, Tastetastic Thursday, One Stop Shoppe, Foodie Friday, Creative Me, Making the World Cuter, Melt in Your Mouth Monday, Just Something I Whipped Up, Market Yourself Monday, Mouthwatering Monday, Trick of Treat Tuesday, Make It Yourself Monday, Kitchen Fun and Crafty Friday